How to enable Windows Sandbox in Windows 10 Version 1903
Microsoft has always added new and exciting features to Windows 10, and although most of the features are not useful for the general public, the introduction of the Windows Sandbox environment has attracted a lot of interest from users. Previously, we were only able to create a “sandbox” in Windows 10 with a third-party tool, but if the system comes with an integrated sandbox tool, the Windows Sandbox, it might be easier and safer than other tools.
Today, on this post, I will introduce you to the specific method of setting up and using the Windows Sandbox in the Windows 10 version 1903.
The Windows Sandbox is a temporary virtual desktop environment, and all your operations and activities in the Windows Sandbox environment do not affect the rest of the system. Therefore, Windows Sandbox is a secure environment that you can test in this environment before changing the configuration or installing an application. When the Sandbox is turned off, it automatically revokes all user actions in the Windows Sandbox before returning to the host.
How does the Windows Sandbox work?
Dynamically generated Image
At its core Windows Sandbox is a lightweight virtual machine, so it needs an operating system image to boot from. One of the key enhancements we have made for Windows Sandbox is the ability to use a copy of the Windows 10 installed on your computer, instead of downloading a new VHD image as you would have to do with an ordinary virtual machine.
Smart memory management
Memory management is another area where we have integrated with the Windows Kernel. Microsoft’s hypervisor allows a single physical machine to be carved up into multiple virtual machines which share the same physical hardware. While that approach works well for traditional server workloads, it isn’t as well suited to running devices with more limited resources. We designed Windows Sandbox in such a way that the host can reclaim memory from the Sandbox if needed.
Integrated kernel scheduler
With ordinary virtual machines, Microsoft’s hypervisor controls the scheduling of the virtual processors running in the VMs. However, for Windows Sandbox we use a new technology called “integrated scheduler” which allows the host to decide when the sandbox runs.
For Windows Sandbox we employ a unique scheduling policy that allows the virtual processors of the sandbox to be scheduled in the same way as threads would be scheduled for a process. High-priority tasks on the host can preempt less important work in the sandbox. The benefit of using the integrated scheduler is that the host manages Windows Sandbox as a process rather than a virtual machine which results in a much more responsive host, similar to Linux KVM.
More…
Windows Sandbox Prerequisites
- Windows 10 Pro or Enterprise Insider build 18305 or later
- AMD64 architecture
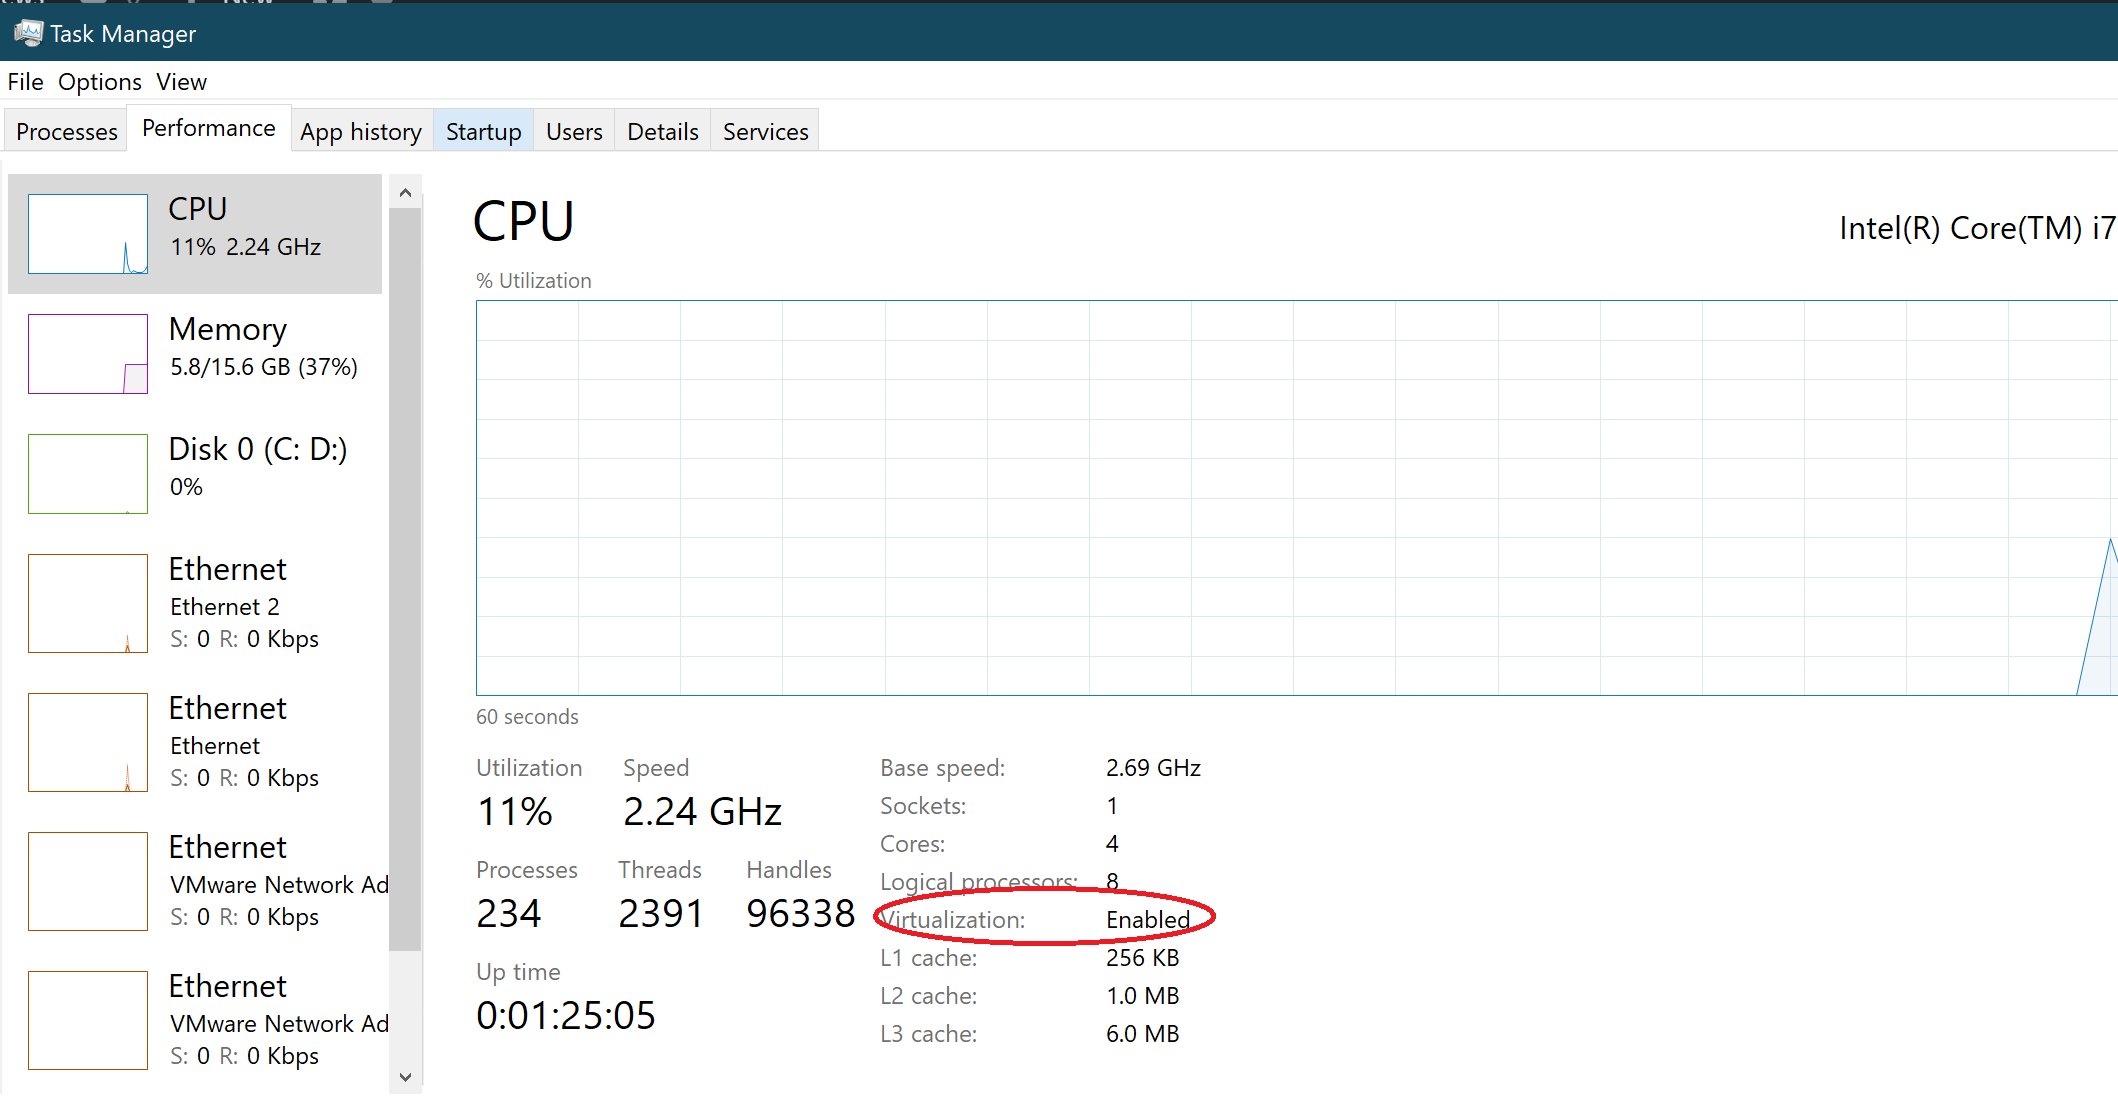
- Virtualization capabilities enabled in BIOS
- At least 4GB of RAM (8GB recommended)
- At least 1 GB of free disk space (SSD recommended)
- At least 2 CPU cores (4 cores with hyperthreading recommended)
Enable Windows Sandbox
- Press Windows + R button, and type appwiz.cpl
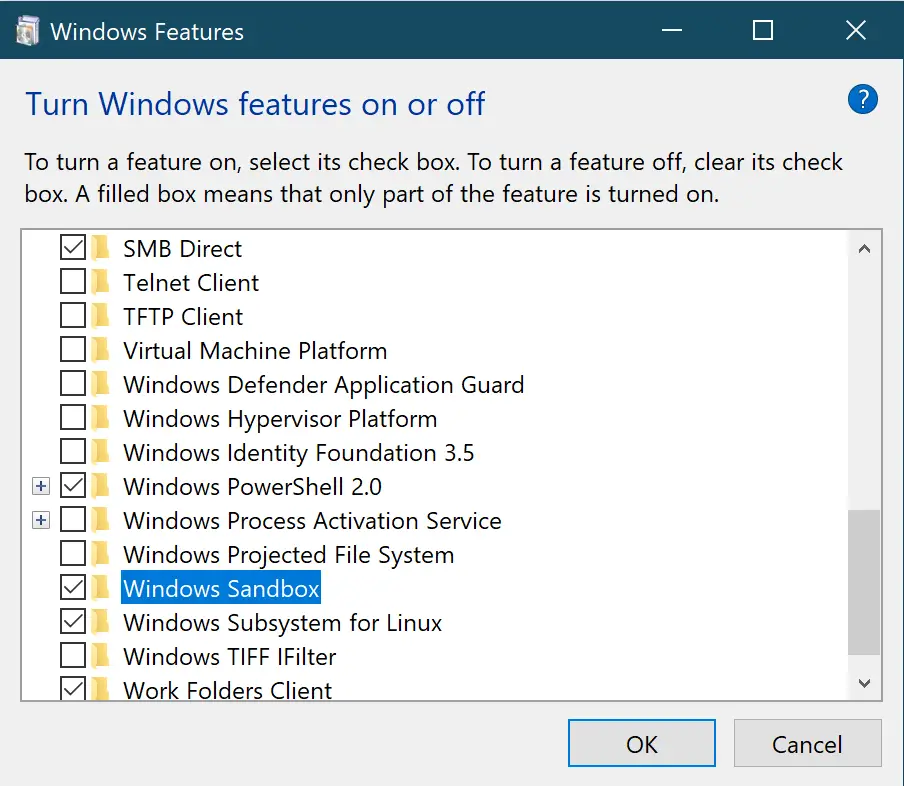
- Click on “Turn Windows features on or off” option
- Check in the Windows Sandbox feature and press OK

- Restart your computer
 Run Windows Sandbox in Hyper-V
- In Guest OS, use the Windows + X shortcut, choose to open “Windows PowerShell (Admin)”
-
Enable nested virtualization by executing the following command:
Set-VMProcessor -VMName <VMName> -ExposeVirtualizationExtensions $true-VMProcessor -VMName <VMName> -ExposeVirtualizationExtensions $true
Replace <VMName> with your Guest OS name - After restarting the virtual machine, the Windows Sandbox can be installed and used.