Developer successfully installs Windows 10 ARM on Raspberry Pi 3/4
The Rasberry Pi 3 and 4 of the Raspberry Pi series have already received official Microsoft support, so you can install the Windows 10 IoT version developed by Microsoft for the Internet of Things.
However, the Internet of Things version is very different from the normal version of Windows 10. The core version of the Internet of Things is a simplified version developed by Microsoft for low-power computers.
Of course, the Raspberry Pi computer is also designed to run small software. Due to performance and power consumption issues, the software with larger expenditures cannot run well.
Windows 10 ARM version is a version developed by Microsoft for devices equipped with ARM processors, such as those currently used on some Qualcomm notebook computers.
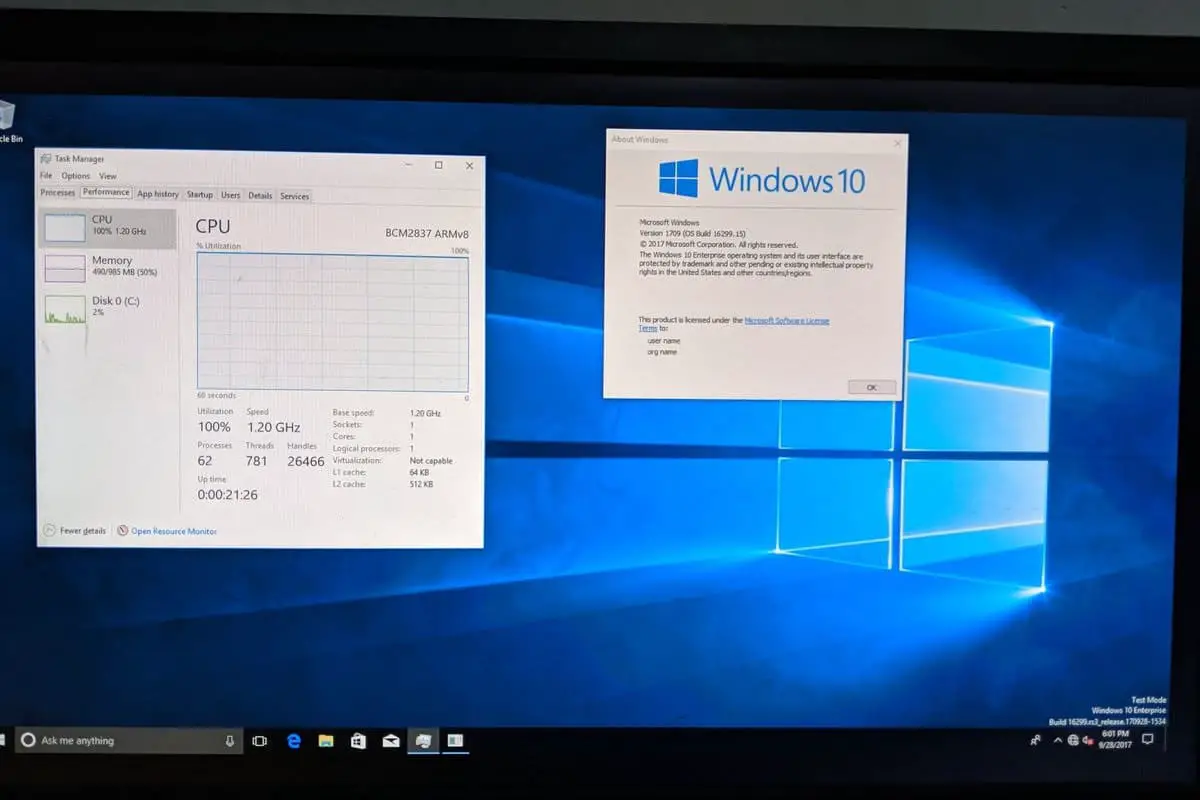
The Raspberry Pi mainly uses Broadcom series processors which are also based on ARM architecture, so it is not particularly bad in terms of compatibility.
So some developers are wondering if they can install Windows 10 ARM version on Raspberry Pi? After testing many times, the developer successfully installs Windows 10 ARM on Raspberry Pi 3/4.
After completing the system installation, you can launch the Win32 desktop software on the Raspberry Pi. In theory, you can also run the 64-bit version of the desktop application through the x86 simulator.
Interested fans can refer to the following guides:
- Download UEFI firmware from here and extract it to FAT32 formatted MicroSD card.
- Download Windows 10 ARM64 Build from here. Only Build 17134 has been tested, but any newer build that passes OOBE should be compatible as well.
- Download ISO compiler from here. As per the dev, this would create the ISO file but you’ll still need the install.wim from sources folder.
- Download ‘Windows on Raspberry’ from here. This would install Build 17134 or newer into a USB storage device and GPT needs to be selected.
After downloading these files and completing the preparations, please click here to operate through the command prompt. Please strictly follow the order of the steps.
Via: windowslatest