If your PC does not support Windows 11, there is now a way to get the preview update
Microsoft has revealed a few days ago that it will release Windows 11 preview versions before the end of this month. These preview versions are development versions pushed to test users through the test plan.
The good news is that even if your computer does not meet the Windows 11 hardware requirements, you can install it. The bad news is that you must participate in Microsoft’s test program before June 24.
Obviously, I have missed the date of participating in this program, but there is still a way to participate in the test program again by modifying the registration form in order to receive the preview version. In this way, you can use the beta version before the official version of Windows 11 is released.
If your computer does not pass the hardware compatibility check, the official version of Windows 11 cannot be installed, and the system must be reinstalled after the preview version ends the test.
Therefore, we strongly recommend that incompatible computers do not participate in this test plan.
If your computer can install the official version of Windows 11 through the compatibility check, there are basically no other problems except for the stability factor participating in the test plan.
Because you can exit the test plan before the official version is released, and seamlessly upgrade after the official version is released so that you can directly use the new version from the end of this month.
Of course, you need to remind yourself that Windows 11 is currently under development, so if you participate in the test plan, the preview version received may have various abnormal problems.

How to access the Windows 11 Dev Insider channel now even without hardware requirements
Open the registry editor and follow the steps below to modify all the key values that need to be changed. After all, restart the system and wait for Microsoft.
#Go to the registry editor this path
Computer \HKEY_LOCAL_MACHINE\SOFTWARE\Microsoft\WindowsSelfHost\UI\Selection
#Right-click in the blank space on the right and select New String Value. A total of 5 new string values need to be created and named as
- UIBranch
#Key value changed to
Dev - ContentType
#Key value modified to
Mainline - Ring
#Key value modified to
External - UIRing
#Key value modified to
External - UIContentType
#Key value modified to
Mainline
#Go to the following registry path
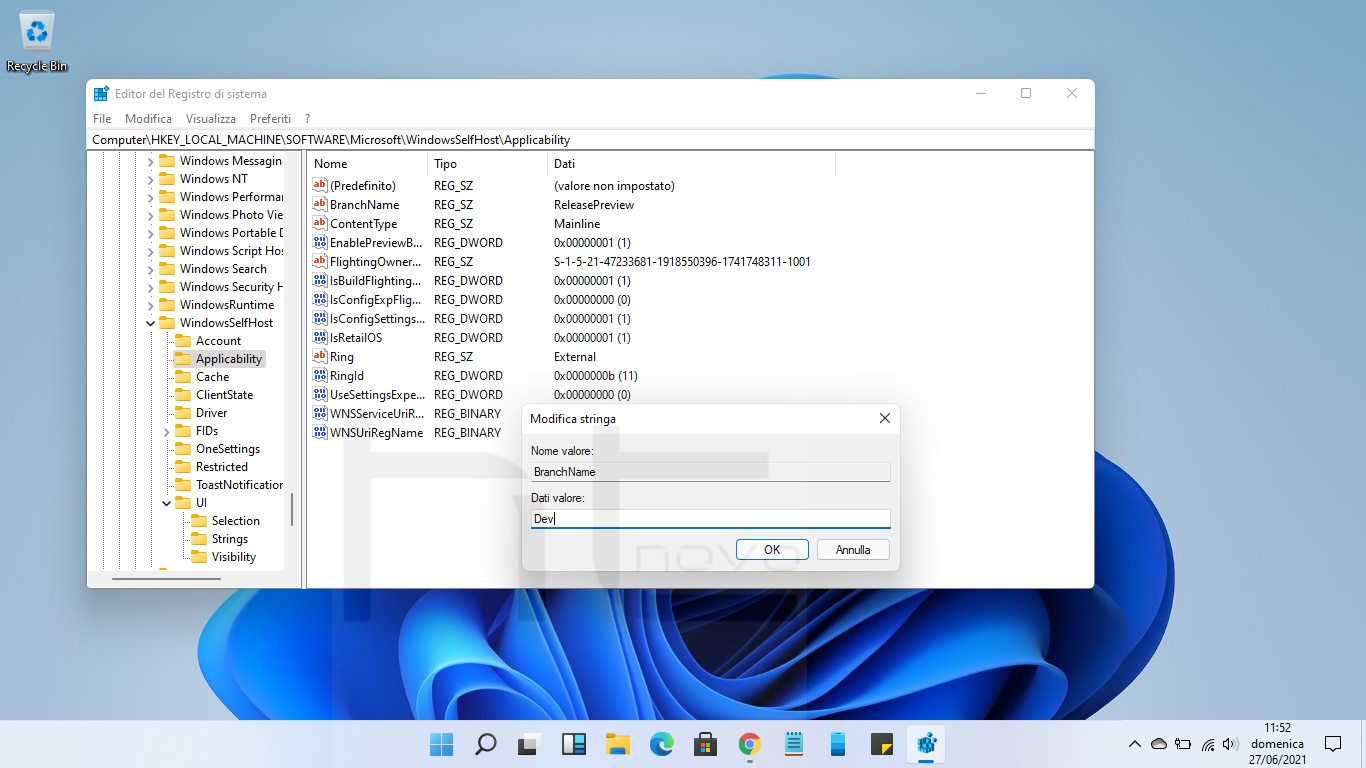
Computer \HKEY_LOCAL_MACHINE\SOFTWARE\Microsoft\WindowsSelfHost\Applicability
#Change the value of the BranchName key to
Dev
#Modify the ContentType key value to
Mainline
#Change the Ring key value to
External
After completing the above modifications, first, restart the system and then go to the settings application, go to the system update and click the Windows Insider option on the left to check the channel.
If the displayed channel is Dev, it means that it has been successfully modified and waited for the new version to be pushed. If it is not displayed, please recheck the registry according to the above steps.
Via: htnovo


