How to use Linux Malware Detect (LMD) to detect and remove malware from Linux
The purpose of malware is to disrupt the smooth and normal operation of a computer system or server, to collect private information or to gain unauthorized access to systems and servers. At present, Linux systems are almost no malware compared to Windows, but this does not mean that Linux users can be assured. As far as the server market is concerned, the market share of Linux systems is much higher than that of Windows, so the loss of malware from Linux servers will be much higher than that of Windows users.
One of the most dangerous forms of attack on Linux systems is that an attacker attempts to obtain login credentials for an administrative user. Once successful, the hacker can perform any operation and access confidential data, and can even attack other machines connected to the Linux server. To solve this problem, users can use Linux Malware Detect (LMD) to detect and remove malware from Linux and keep the system clean.

Linux Malware Detect
Linux Malware Detect (LMD) is a malware scanner for Linux released under the GNU GPLv2 license, that is designed around the threats faced in shared hosted environments. It uses threat data from network edge intrusion detection systems to extract malware that is actively being used in attacks and generates signatures for detection. In addition, threat data is also derived from user submissions with the LMD checkout feature and from malware community resources. The signatures that LMD uses are MD5 file hashes and HEX pattern matches, they are also easily exported to any number of detection tools such as ClamAV.
Features:
– MD5 file hash detection for quick threat identification
– HEX based pattern matching for identifying threat variants
– statistical analysis component for detection of obfuscated threats (e.g: base64)
– integrated detection of ClamAV to use as scanner engine for improved performance
– integrated signature update feature with -u|–update
– integrated version update feature with -d|–update-ver
– scan-recent option to scan only files that have been added/changed in X days
– scan-all option for full path based scanning
– checkout option to upload suspected malware to rfxn.com for review / hashing
– full reporting system to view current and previous scan results
– quarantine queue that stores threats in a safe fashion with no permissions
– quarantine batching option to quarantine the results of a current or past scans
– quarantine restore option to restore files to original path, owner and perms
– quarantine suspend account option to Cpanel suspend or shell revoke users
– cleaner rules to attempt removal of malware injected strings
– cleaner batching option to attempt cleaning of previous scan reports
– cleaner rules to remove base64 and gzinflate(base64 injected malware
– daily cron based scanning of all changes in last 24h in user homedirs
– daily cron script compatible with stock RH style systems, Cpanel & Ensim
– kernel based inotify real time file scanning of created/modified/moved files
– kernel inotify monitor that can take path data from STDIN or FILE
– kernel inotify monitor convenience feature to monitor system users
– kernel inotify monitor can be restricted to a configurable user html root
– kernel inotify monitor with dynamic sysctl limits for optimal performance
– kernel inotify alerting through daily and/or optional weekly reports
– e-mail alert reporting after every scan execution (manual & daily)
– path, extension and signature based ignore options
– background scanner option for unattended scan operations
– verbose logging & output of all actions
Install Linux Malware Detect
Open a terminal and run the following command to download Maldet packet:
wget http://www.rfxn.com/downloads/maldetect-current.tar.gz
Extract the downloaded file using the following command:
tar –zxvf maldetect–current.tar.gz
Go to maldetect directory
cd maldetect-x-version
Execute the install.sh script:
sudo install.sh
If the installation is successful, you will receive notifications and where Maldet is installed. The default is to install to the /usr/local/maldetect/ path.
Using Maldet
vi /usr/local/maldetect/conf.maldet
Email Alert Option

- set email_alert to 1
- add your email address at email_addr
-
set email_ignore_clean to 1 to ignore alert messages when malware is automatically cleared.
Quarantine Option

- set quarantine_hits to 1 to automatically isolate malware and affected files
-
setting quarantine_clean to 1 automatically cleans up the affected files (not recommended)
-
set quarantine_suspend_user to 1 to suspend affected accounts (not recommended)
There are many options in the conf.maldet configuration file that can be configured. You should save it after adjusting according to your needs.
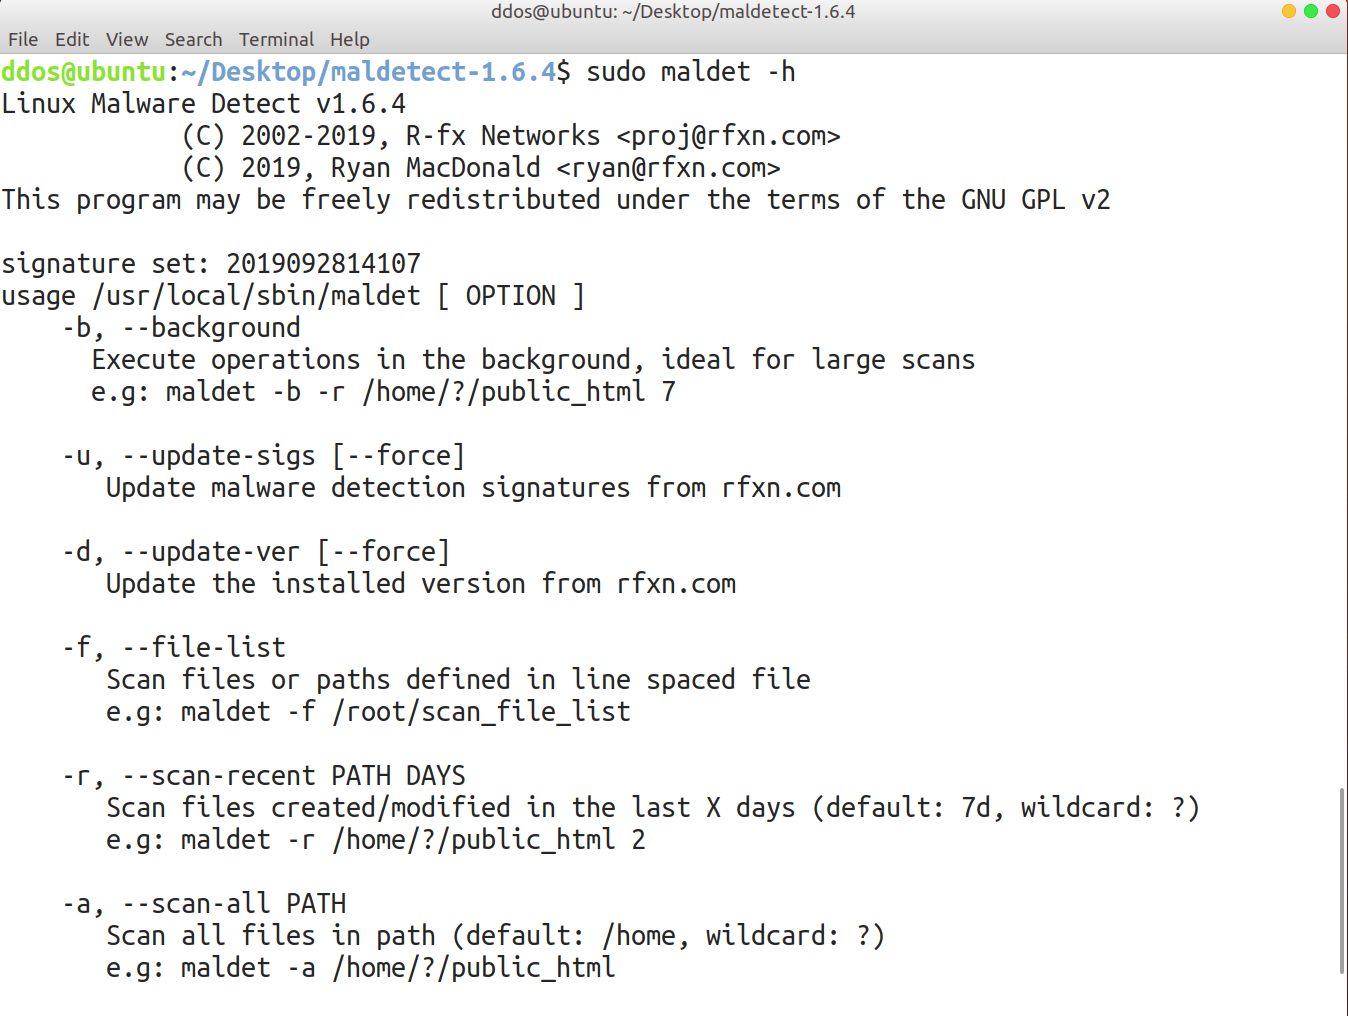
Maldet can perform scan tasks manually by executing the following command:
sudo maldet —scan–all /folders/to/scan
sudo maldet –restore FILENAME
Automatic scanning with cronjob task


