How to secure SSH service with Fail2Ban
Fail2Ban scans log files like /var/log/auth.log and bans IP addresses conducting too many failed login attempts. It does this by updating system firewall rules to reject new connections from those IP addresses, for a configurable amount of time. Fail2Ban comes out-of-the-box ready to read many standard log files, such as those for sshd and Apache, and is easily configured to read any log file of your choosing, for any error you wish.
On this post, I’m going guide you on how to secure SSH service with Fail2Ban.
First, you need to install Fail2ban:
apt–get install fail2ban
After installation Fail2ban starts working immediately, but only for SSH and with default settings. Now add the settings we need. The whole configuration is in the file /etc/fail2ban/jail.conf. We will need to change the SSH section:
[ssh]enabled = trueport = sshfilter = sshdlogpath = /var/log/auth.logmaxretry = 5findtime = 3600bantime = 86400
Parameter
maxretry: the maximum number of incorrect connections during the time specified in the findtime parameter
findtime: the time in the log file for which the number of incorrect connections is analyzed. Calculated in seconds
bantime: blocking time in seconds
bantime: blocking time in seconds
Save and restart Fail2ban:
service fail2ban restart
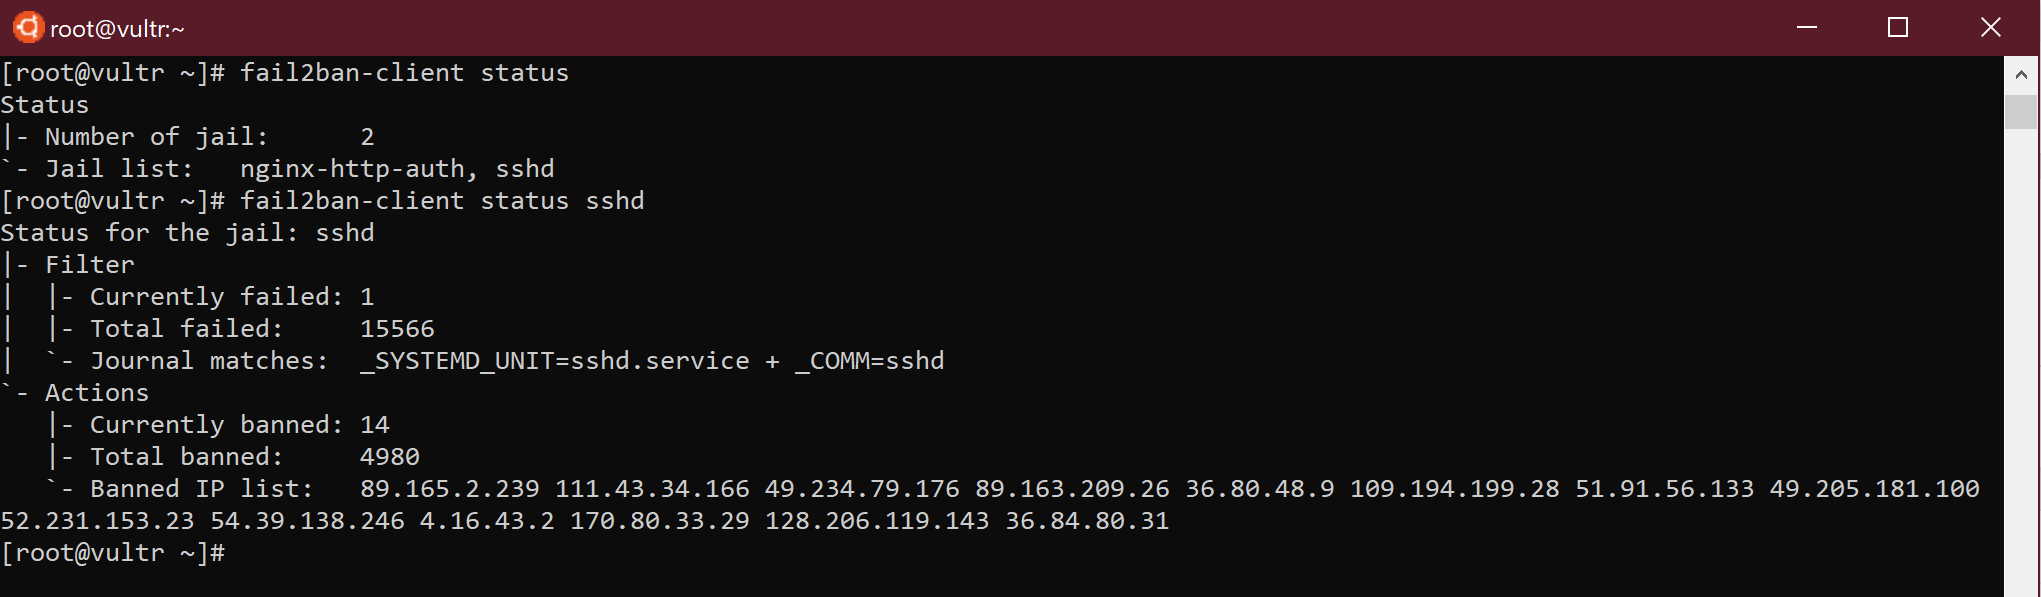
Now after 5 incorrect password entries within an hour, the address will be blocked for a day. You can find out the list of included protections with the command:
fail2ban–client status
You can find out statistics on blocked clients for each service using the command:
fail2ban–client status service_name
Support Our Threat Intelligence
If you find our technology report and cybersecurity news helpful, consider supporting our work.

USDT (TRC20):
TN8BdV8cp4T1Cd28gK9qTAnZknzzuwyUtm
USDT (ERC20):
0x3725e1a7d3bc5765499fa6aaafe307fabcd75bce


